This integration is powered by Singer's Campaign Manager tap. For support, visit the GitHub repo or join the Singer Slack.
Campaign Manager integration summary
Stitch’s Campaign Manager integration replicates data using the Campaign Manager 360 API . Refer to the Schema section for a list of objects available for replication.
Campaign Manager feature snapshot
A high-level look at Stitch's Campaign Manager (v1) integration, including release status, useful links, and the features supported in Stitch.
| STITCH | |||
| Release status |
Released on August 17, 2018 |
Supported by | |
| Stitch plan |
Standard |
API availability |
Available |
| Singer GitHub repository | |||
| REPLICATION SETTINGS | |||
| Anchor Scheduling |
Supported |
Advanced Scheduling |
Unsupported |
| Table-level reset |
Unsupported |
Configurable Replication Methods |
Unsupported |
| DATA SELECTION | |||
| Table selection |
Supported |
Column selection |
Unsupported |
| Select all |
Supported |
||
| TRANSPARENCY | |||
| Extraction Logs |
Supported |
Loading Reports |
Supported |
Connecting Campaign Manager
Campaign Manager setup requirements
To set up Campaign Manager in Stitch, you need:
-
A Campaign Manager account. Refer to Google’s website for signup information.
-
API access. Most accounts have this enabled by default. If you’re not sure, contact your representative or the support team.
-
Access to the reports you want to replicate. Stitch will only be able to replicate the reports that the user who authorizes the integration has access to.
Step 1: Verify report access
Before you connect Campaign Manager to Stitch, you should verify that you have access to the reports you want to replicate. Stitch will only be able to replicate data for the same reports that you have access to in Campaign Manager.
- Sign into your Campaign Manager account and navigate to the Report Builder page.
- Under Reports, click My Reports.
-
A list of all the reports you have access to will display:
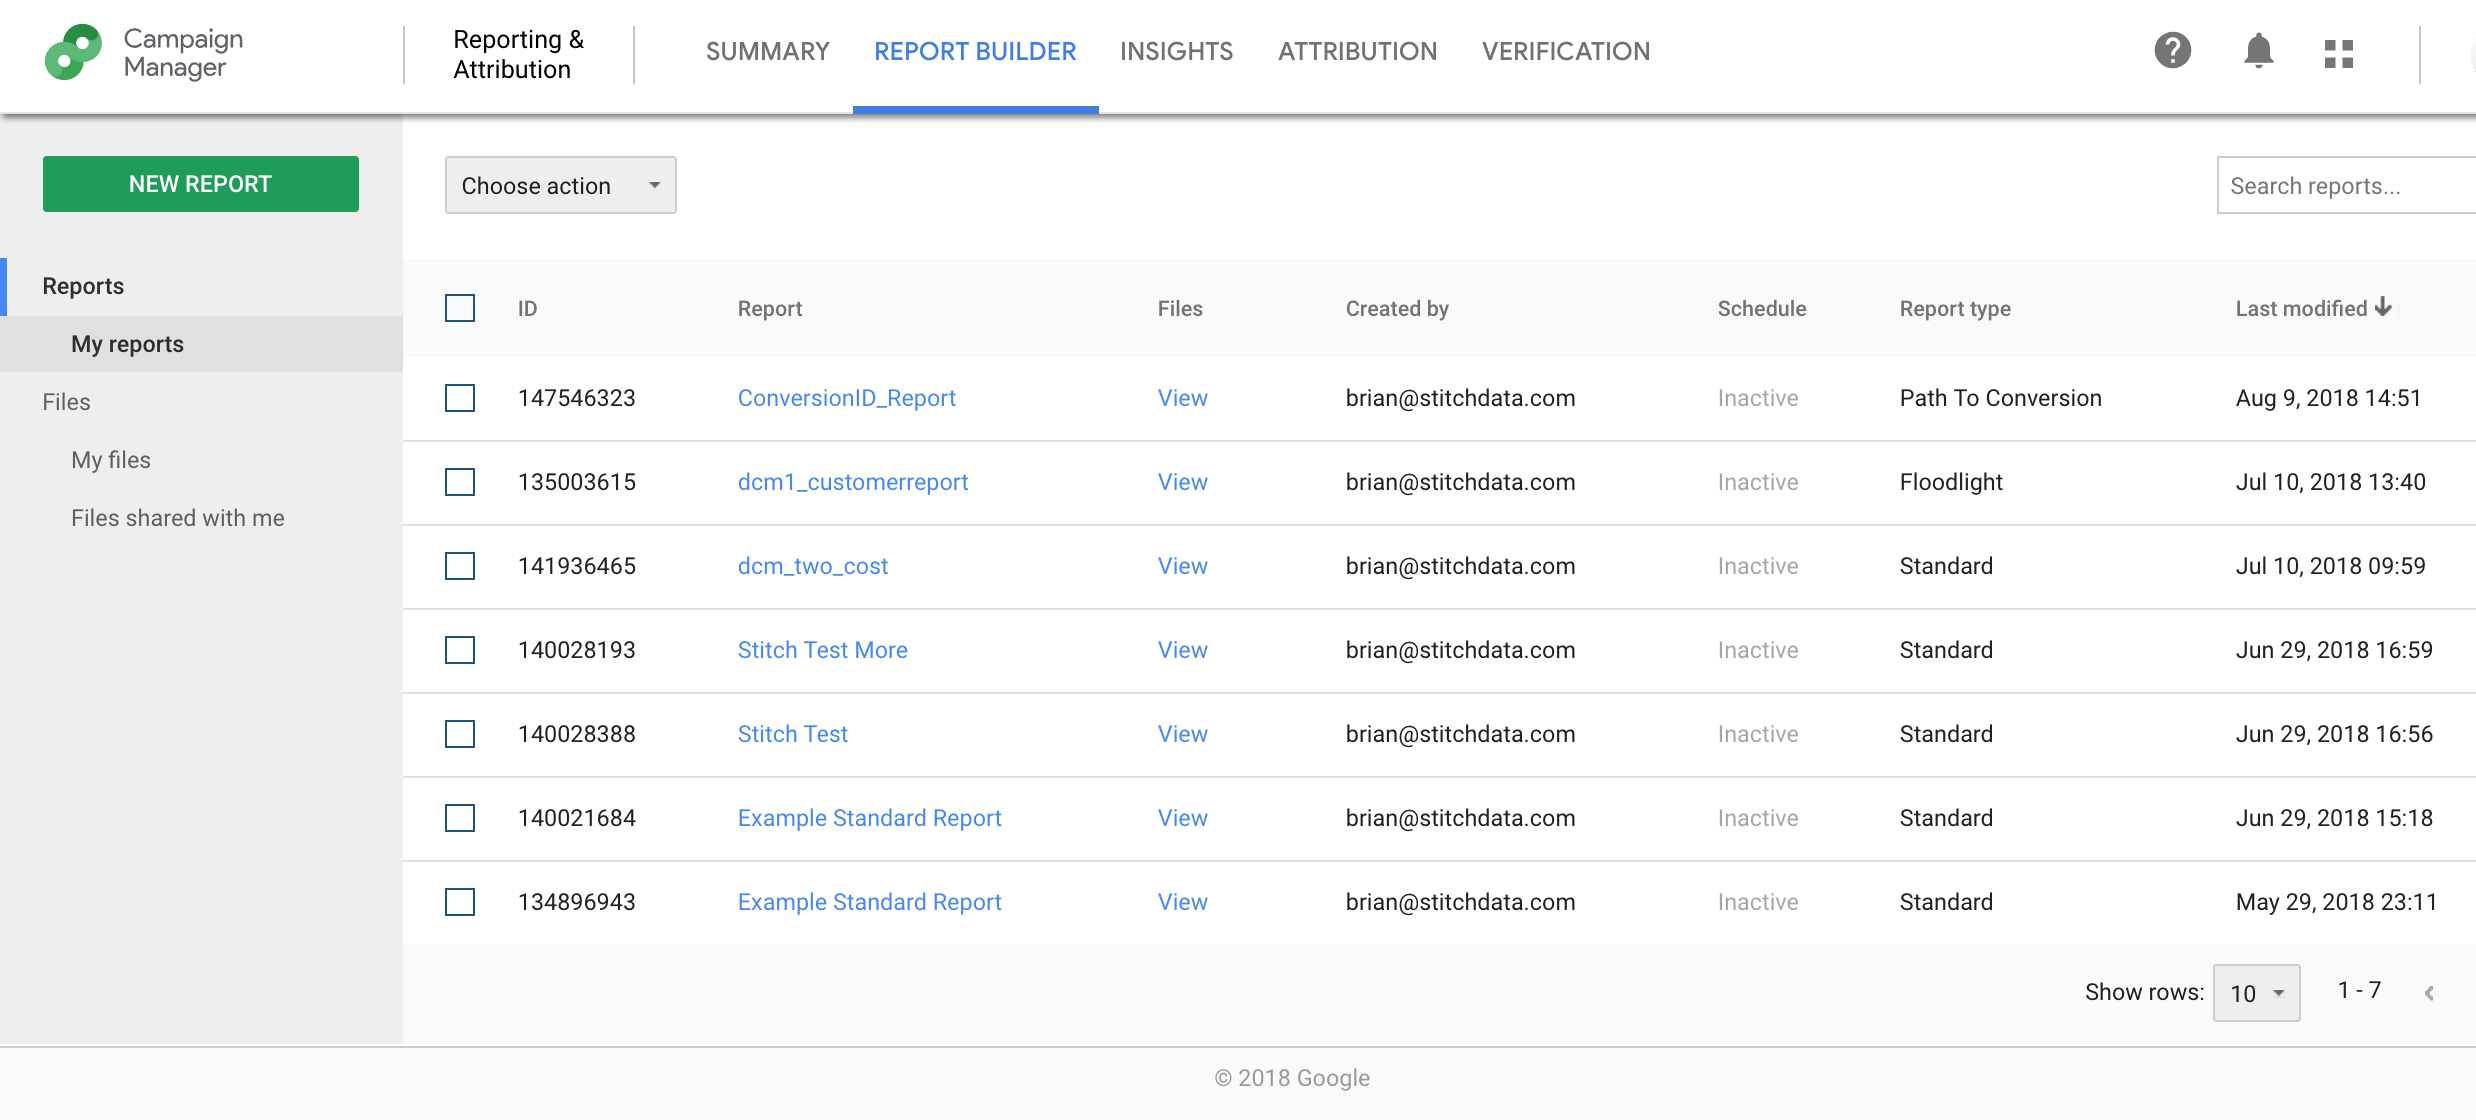
- Verify that the reports you want to replicate are listed on this page.
Step 2: Locate your Campaign Manager profile ID
- Sign into your Campaign Manager account.
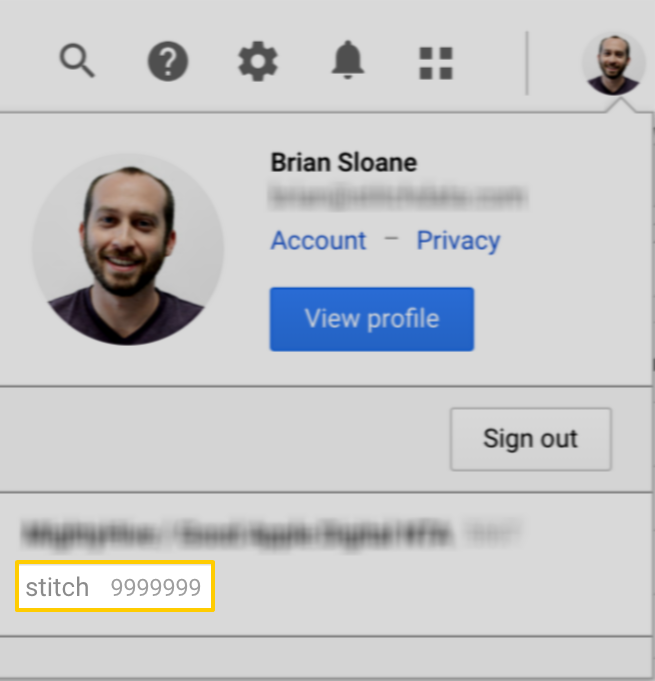
- Click the user menu (your icon) in the top right corner.
- In the dropdown beneath the Sign out button will be a list of the profiles you have access to.
-
Locate the ID of the profile you want to connect. This will be a seven digit number next to the name of the profile. For example:
9999999An example is highlighted in the image to the right.
- Copy the profile ID.
Keep this handy - you’ll need it in the next step.
Step 3: Add Campaign Manager as a Stitch data source
- Sign into your Stitch account.
-
On the Stitch Dashboard page, click the Add Integration button.
-
Click the Campaign Manager icon.
-
Enter a name for the integration. This is the name that will display on the Stitch Dashboard for the integration; it’ll also be used to create the schema in your destination.
For example, the name “Stitch Campaign Manager” would create a schema called
stitch_campaign_managerin the destination. Note: Schema names cannot be changed after you save the integration. - In the Profile ID field, paste the ID of the Campaign Manager profile from Step 2. This value should be a seven digit number such as
9999999.
Step 4: Create a replication schedule
In the Replication Frequency section, you’ll create the integration’s replication schedule. An integration’s replication schedule determines how often Stitch runs a replication job, and the time that job begins.
Campaign Manager integrations support the following replication scheduling methods:
To keep your row usage low, consider setting the integration to replicate less frequently. See the Understanding and Reducing Your Row Usage guide for tips on reducing your usage.
Step 5: Authorize Stitch to access Campaign Manager
- If you aren’t already signed into your Google account, you’ll be prompted for your credentials.
- After you sign in, you’ll see a list of the permissions requested by Stitch:
- View and manage DoubleClick for Advertisers reports - This is required to allow Stitch to view and run reports. Note: Stitch will not alter report settings, and will only ever read data. Refer to the Replication section below for more info.
- To grant access, click the Allow button.
- After you’ve granted access, you’ll be redirected back to Stitch to finish setting up the integration.
Step 6: Set objects to replicate
The last step is to select the tables you want to replicate. Learn about the available tables for this integration.
Note: If a replication job is currently in progress, new selections won’t be used until the next job starts.
For Campaign Manager integrations, you can select:
-
Individual tables
-
All tables
Click the tabs to view instructions for each selection method.
- In the integration’s Tables to Replicate tab, locate a table you want to replicate.
-
To track a table, click the checkbox next to the table’s name. A blue checkmark means the table is set to replicate.
- Repeat this process for all the tables you want to replicate.
- When finished, click the Finalize Your Selections button at the bottom of the screen to save your selections.
- Click into the integration from the Stitch Dashboard page.
-
Click the Tables to Replicate tab.
- In the list of tables, click the box next to the Table Names column.
-
In the menu that displays, click Track all Tables and Fields:
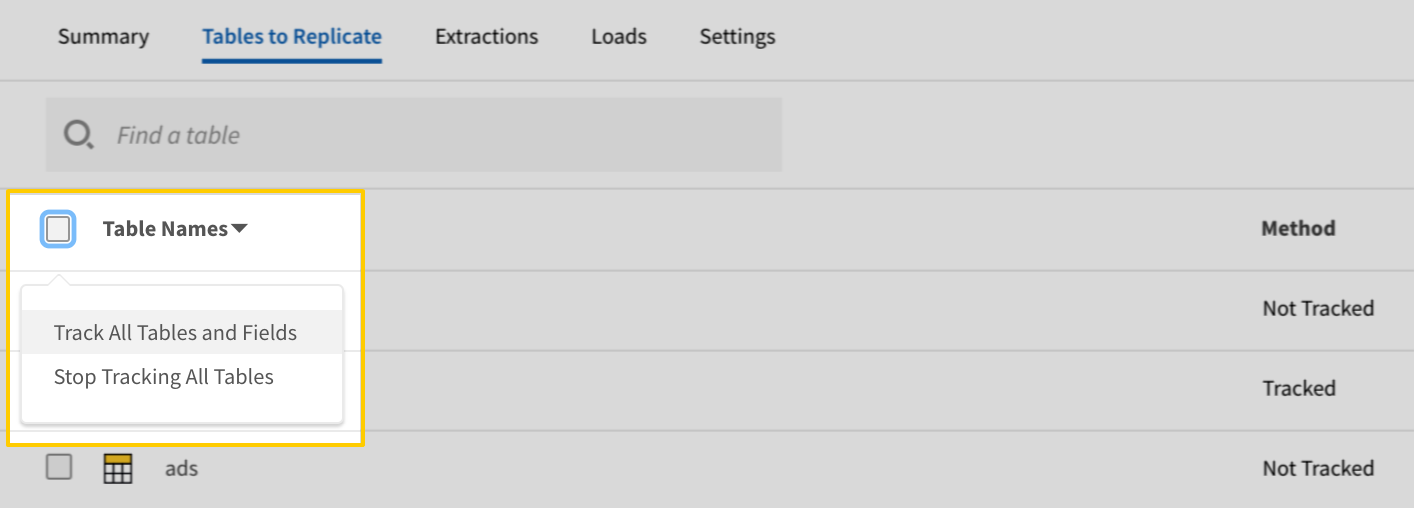
- Click the Finalize Your Selections button at the bottom of the page to save your data selections.
Initial and historical replication jobs
After you finish setting up Campaign Manager, its Sync Status may show as Pending on either the Stitch Dashboard or in the Integration Details page.
For a new integration, a Pending status indicates that Stitch is in the process of scheduling the initial replication job for the integration. This may take some time to complete.
Initial replication jobs with Anchor Scheduling
If using Anchor Scheduling, an initial replication job may not kick off immediately. This depends on the selected Replication Frequency and Anchor Time. Refer to the Anchor Scheduling documentation for more information.
Free historical data loads
The first seven days of replication, beginning when data is first replicated, are free. Rows replicated from the new integration during this time won’t count towards your quota. Stitch offers this as a way of testing new integrations, measuring usage, and ensuring historical data volumes don’t quickly consume your quota.
Campaign Manager replication
When Stitch replicates data from Campaign Manager, the process will look like this:
- Stitch runs the selected report using the report’s defined date range and included dimensions and metrics.
- Campaign Manager creates a CSV file of the report results.
- Stitch replicates the results from the CSV.
Each run of a report will have its own CSV file in Campaign Manager, which you can access by signing into your Campaign Manager account.
Report date ranges
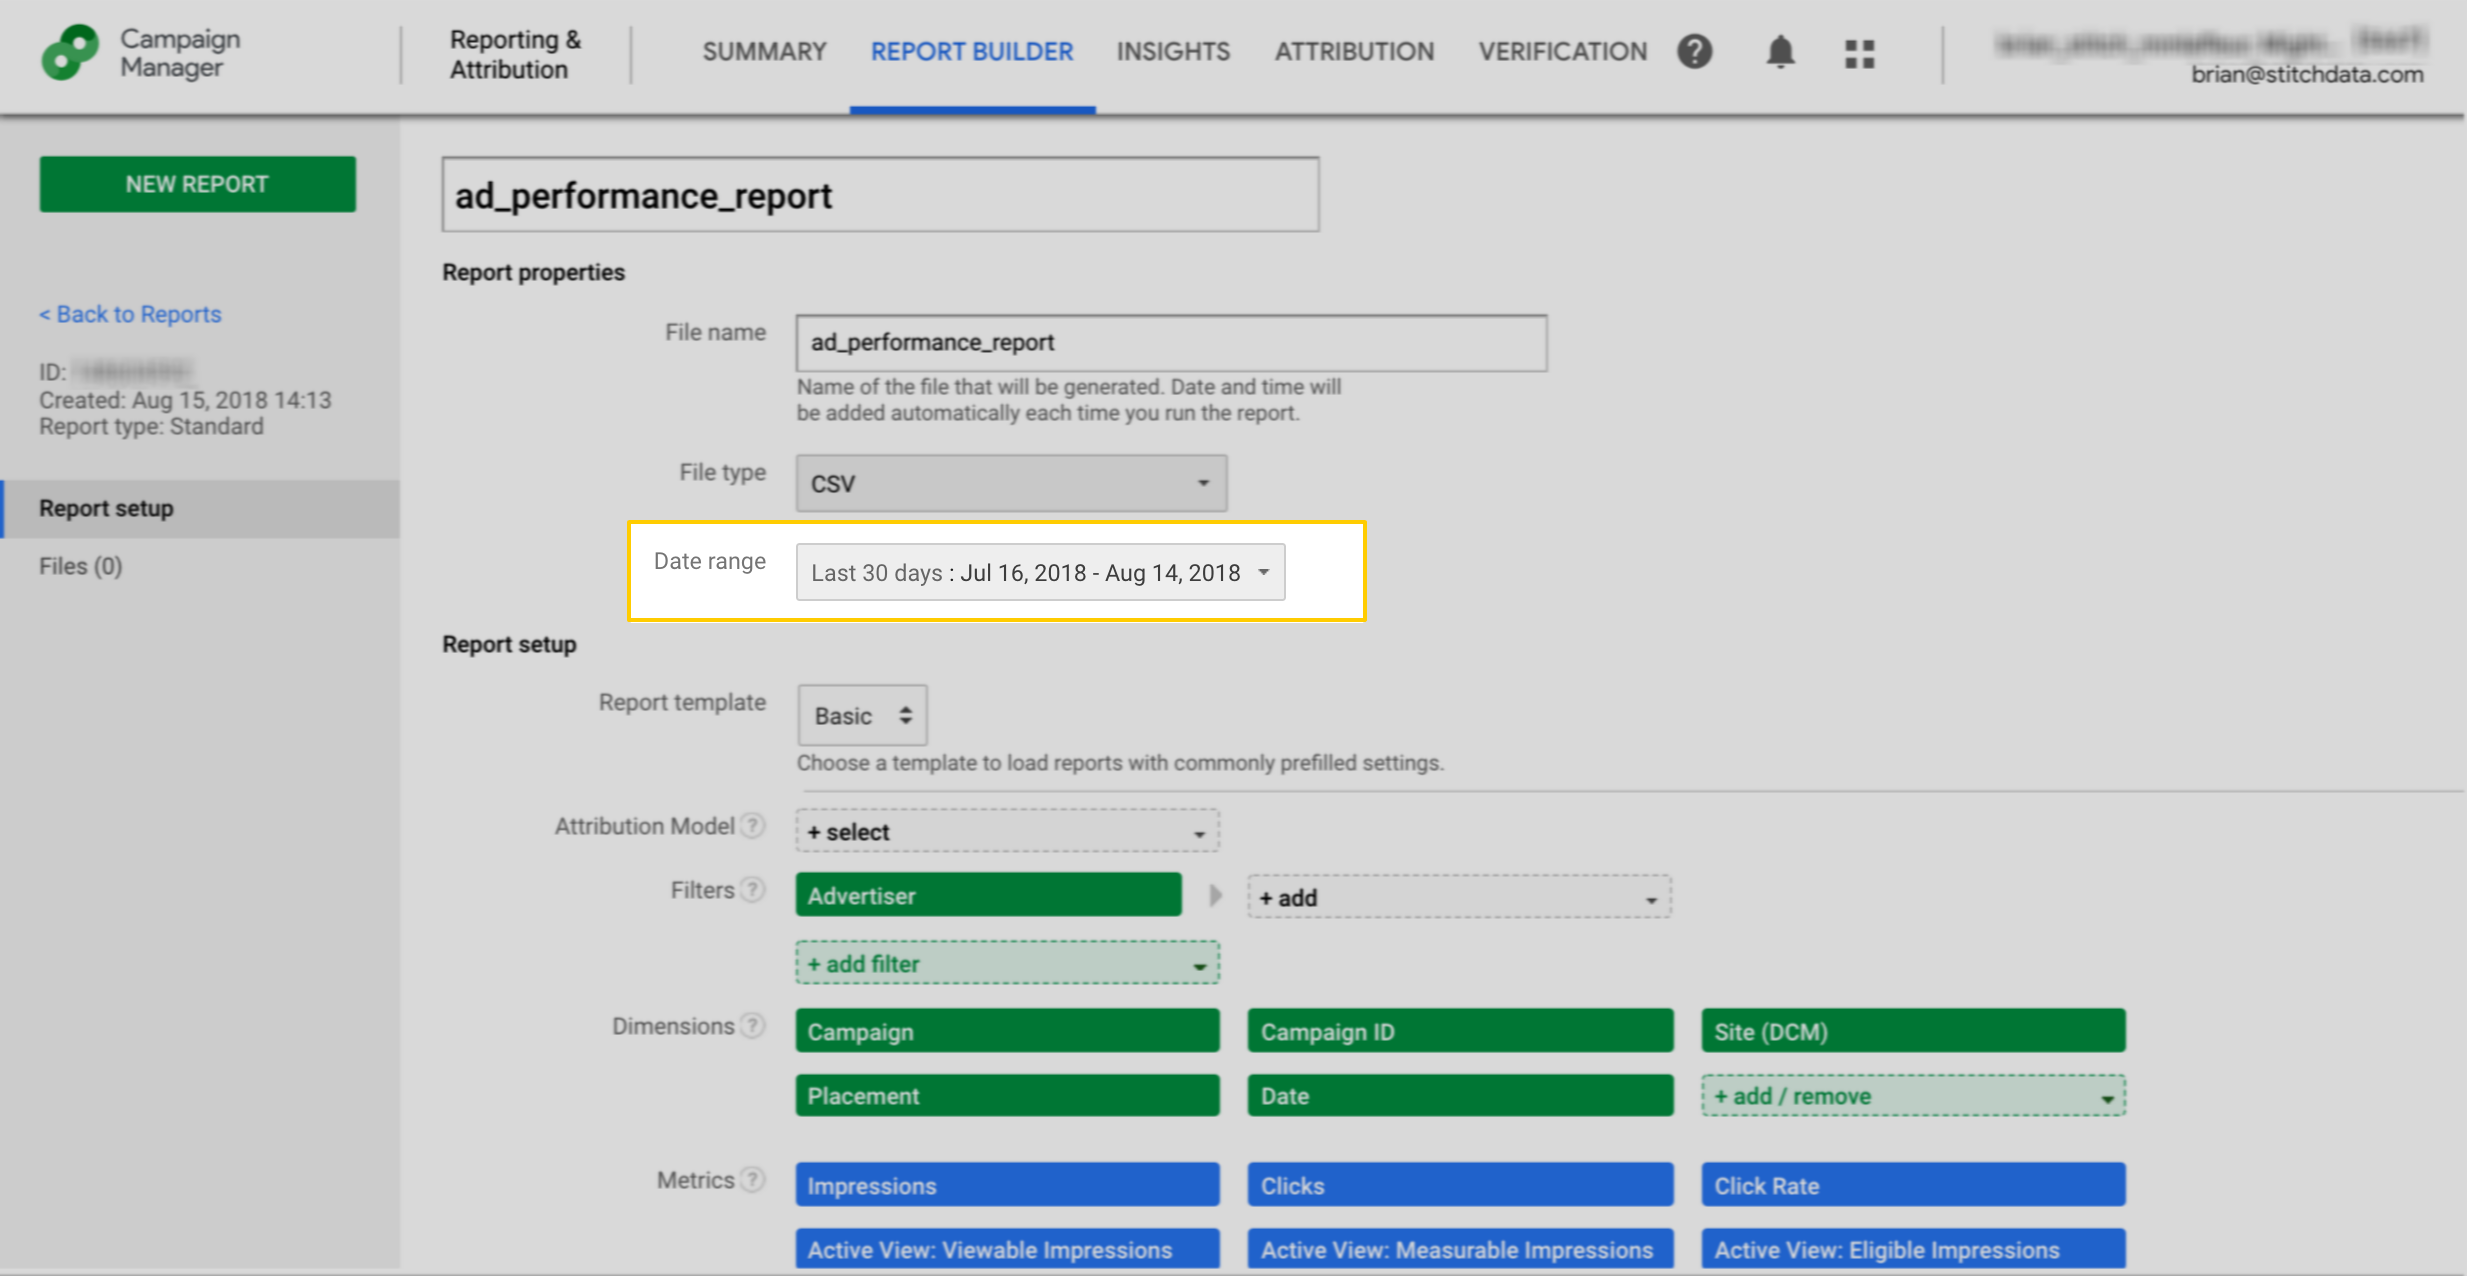
When Stitch replicates data for a given report, it will use the date range currently defined in Campaign Manager for that report.
For example: The image below shows the configuration for a report named ad_performance_report, where the date range is set to the last 30 days. When Stitch replicates data for this report, it will run the report using these settings:
Data loading and Append-Only Replication
When Stitch loads the extracted data into your destination, it will do so using Append-Only Replication. This is a type of Incremental Replication where existing rows aren’t updated, but appended to the end of the table.
Additionally, the number of rows loaded into the table during each replication job is dependent on the combination of unique values in the dimension columns you track. See the Column Selection and Statistic Aggregation section for more info and examples.
Example
Let’s say these columns are tracking in the ad_performance_report table:
-
date(dimension) - The date pertaining to the record. campaignId(dimension) - This is the ID associated with a campaign. In this example, there are two campaigns:929007494and929599581device(dimension) - The device type. There are two values for this example:ComputerandTabletimpressions(metric) - The total number of impressions.
Every time Stitch replicates and loads data, a row for each unique combination of the dimension columns will be appended to the end of the table:
| _sdc_report_datetime | date | campaignId | device | impressions | |
|---|---|---|---|---|---|
| 2017-10-01 17:48:26.791 | 2017-09-10 00:00:00 | 929007494 | Computer | 61 | |
| 2017-10-01 17:48:26.791 | 2017-09-10 00:00:00 | 929007494 | Tablet | 15 | |
| 2017-10-01 17:48:26.791 | 2017-09-10 00:00:00 | 929599581 | Computer | 37 | |
| 2017-10-01 17:48:26.791 | 2017-09-10 00:00:00 | 929599581 | Tablet | 9 |
Query for the latest data
You may need to alter this query
The query below is meant to act as a foundation for writing your own. Depending on your SQL syntax and the dimensions contained in a given table, you may need to alter this query for your own usage.
When querying your Campaign Manager data, you’ll want to include the Dimensions you’re analyzing in the partition. For example: If you’re analyzing campaigns over time, you’d include columns like campaignId and date.
If you want only the most recently replicated data for any Campaign Manager table, you can use the sample query below to account for the Append-Only Replication Stitch uses.
This query will use the report’s Dimensions and the _sdc_report_datetime column to return the latest data:
SELECT *
  FROM (
        SELECT *,
        RANK() OVER (PARTITION BY dimension_1, dimension_2, etc.,
                     ORDER BY _sdc_report_datetime DESC)
        FROM ad_performance_report
        ORDER BY dimension_1, dimension_2, etc. ASC
       ) AS latest
 WHERE latest.rank = 1
In this query:
- A subquery first uses a window function to create a ‘window’ of data for each combination of Dimensions,
- The values of the
_sdc_report_datetimecolumn are ranked within each window partition, and - Then, in the outer query, only the rows with
_sdc_report_datetimevalues ranked as1- which is equal to the maximum timestamp - are returned.
Campaign Manager table reference
Schemas and versioning
Schemas and naming conventions can change from version to version, so we recommend verifying your integration’s version before continuing.
The schema and info displayed below is for version 1 of this integration.
This is the latest version of the Campaign Manager integration.
Table and column names in your destination
Depending on your destination, table and column names may not appear as they are outlined below.
For example: Object names are lowercased in Redshift (CusTomERs > customers), while case is maintained in PostgreSQL destinations (CusTomERs > CusTomERs). Refer to the Loading Guide for your destination for more info.
| Related | Troubleshooting |
Questions? Feedback?
Did this article help? If you have questions or feedback, feel free to submit a pull request with your suggestions, open an issue on GitHub, or reach out to us.