New version available!
This guide is applicable to v1 of Stitch’s BigQuery destination.
- To connect a new v2 destination, use these instructions
- To migrate from v1 to v2, use these instructions
Prerequisites
A user with full access to an existing Google Cloud Platform (GCP) project within BigQuery. Stitch won’t be able to create one for you.
Admin permissions for BigQuery and Google Cloud Storage (GCS). This includes the BigQuery Admin and Storage Admin permissions. Stitch requires these permissions to create and use a GCS bucket to load replicated data into BigQuery.
Access to a project where billing is enabled and a credit card is attached. Even if you’re using BigQuery’s free trial, billing must still be enabled for Stitch to load data.
Step 1: Create a GCP account
Sign up here to get started.
Step 2: Create a GCP project and enable billing
Next, create a new GCP project to house your BigQuery destination by following these instructions.
Be sure to enable billing for the account and attach a credit card, even if you’re using the free trial option. If billing isn’t enabled, Stitch will encounter issues when loading data into your data warehouse.
Step 3: Grant user permissions
resourcemanager.projects.setIamPolicy privilege.
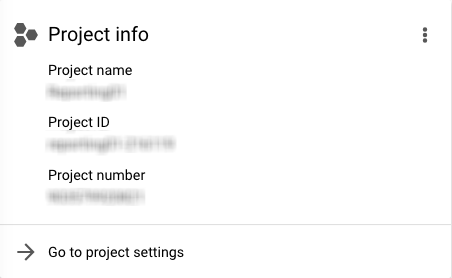
After the project has been created, open the project in the GCP console. You can do this by either:
-
Clicking Go to project settings in the Project Info box on the dashboard page, as seen to the right.
-
Toggling between Projects by clicking the drop-down menu next to the Google Cloud Platform logo in the upper-left corner.
Then, follow the instructions in the tab below. Note: Even if the user has Owner permissions, the permissions outlined below must still be granted to the user. Stitch will encounter loading errors otherwise.
-
In the page that displays, click the IAM option in the menu on the left side of the page. This will display a page of all the members that have access to the project.
-
In the list, locate the user you want to use to connect BigQuery to Stitch.
-
Click the pencil icon in the row for the user. This will open the Edit Permissions modal.
-
If the user already has a role assigned, click + Add Another Role.
-
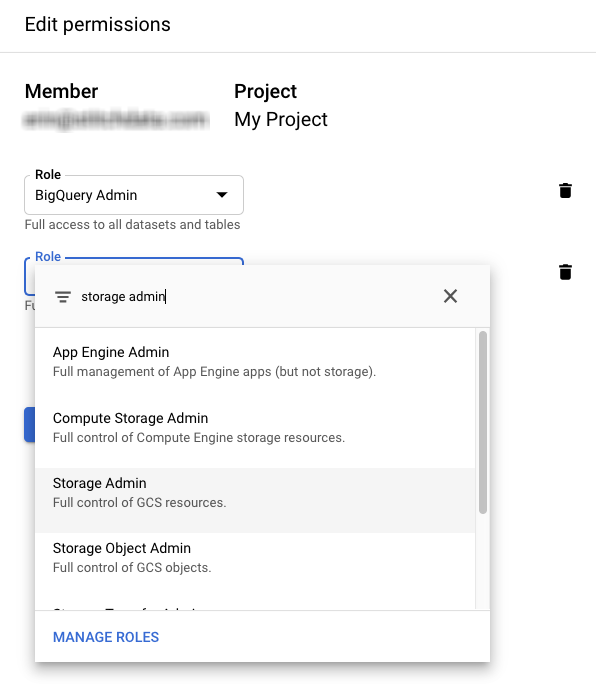
Click the Role field.
-
In the search box, type
bigquery adminand click the BigQuery Admin result. -
Click + Add Another Role and click the Role field again.
-
In the search box, type
storage adminand click the Storage Admin result. -
Click Save.
In the table below are the database user privileges Stitch requires to connect to and load data into BigQuery.
| Privilege name | Reason for requirement |
| BigQuery Admin (roles/bigquery.admin) |
Required to create the necessary objects in a BigQuery project to load and store your data. |
| Storage Admin (roles/storage.admin) |
Required to access and create objects in a Google Cloud Storage (GCS) bucket. Stitch uses a GCS bucket to temporarily store data before loading it into a dataset in your BigQuery project. |
Step 4: Authenticate with Google
Next, you’ll complete Google’s authorization process and grant Stitch access to the BigQuery project you created in Step 2.
- Sign into your Stitch account, if you haven’t already.
- Click the Destination tab, then the BigQuery icon.
- Click Sign in with Google.
- If you aren’t already signed into your Google account, you’ll be prompted for your credentials. Sign in as the same user you granted BigQuery and Storage Admin permissions to in Step 3.
- After you sign in, you’ll see a list of the permissions requested by Stitch:
- Read/Write Access to Google Cloud Storage - Stitch requires Read/Write access to create and use a GCS bucket to load replicated data into BigQuery.
- Full Access to BigQuery - Stitch requires full access to be able to create datasets and load data into BigQuery.
- Read-Only Access to Projects - Stitch requires read-only access to projects to allow you to select a project to use during the BigQuery setup process.
- Basic Profile Information - Stitch uses your basic profile info to retrieve your user ID.
- Offline Access - To continuously load data, Stitch requires offline access. This allows the authorization token generated during setup process to be used for more than an hour after the initial authentication takes place.
- To grant access, click the Authorize button.
Step 5: Select a Google Cloud Project and Storage Location
After you sign into Google and grant Stitch access, you’ll be redirected back to Stitch. The last step is to select the select a project and define a storage location for your destination.
Fill in the fields as follows:
-
From the Google Cloud Project dropdown, select the project you created in Step 2.
-
From the Google Cloud Storage Location, select the location where data should be stored:
-
US -
EU -
europe-west2 -
asia-northeast1 -
asia-southeast1 -
australia-southeast1
-
-
Click Finish Setup.
| Related | Troubleshooting |
Questions? Feedback?
Did this article help? If you have questions or feedback, feel free to submit a pull request with your suggestions, open an issue on GitHub, or reach out to us.