Prerequisites
An Amazon Web Services (AWS) account with a Databricks Delta Lake (AWS) deployment. Instructions for configuring a Databricks Delta Lake (AWS) deployment are outside the scope of this tutorial; our instructions assume that you have Databricks Delta Lake (AWS) up and running. Refer to Databricks’ documentation for help configuring your AWS account with Databricks.
-
An existing Amazon S3 bucket that must be:
- In the same region as your Stitch account. For example: If your Stitch account uses the North America (
us-east-1) data pipeline region, your S3 bucket must also be inus-east-1. Here’s how to verify your Stitch account’s data pipeline region. - In the same AWS account as the Databricks deployment or have a cross-account bucket policy that allows access to the bucket from the AWS account with the Databricks deployment.
- In the same region as your Stitch account. For example: If your Stitch account uses the North America (
Permissions to manage S3 buckets in AWS. Your AWS user must be able to add and modify bucket policies in the AWS account or accounts where the S3 bucket and Databricks deployment reside.
Step 1: Configure S3 bucket access in AWS
Step 1.1: Grant Stitch access to your Amazon S3 bucket
To allow Stitch to access the bucket, you’ll need to add a bucket policy using the AWS console. Follow the instructions in the tab below to add the bucket policy.
-
Sign into your Amazon Web Services (AWS) account as a user with privileges that allows you to manage S3 buckets.
-
Click Services near the top-left corner of the page.
-
Under the Storage option, click S3.
-
A page listing all buckets currently in use will display. Click the name of the bucket that is used with Databricks.
-
Click the Permissions tab.
-
In the Permissions tab, click the Bucket Policy button.
-
In the Bucket policy editor, paste the bucket policy for your Stitch data pipeline region and replace
<YOUR-BUCKET-NAME>with the name of your S3 bucket.Not sure what your Stitch data pipeline region is? Click here for help.
North America (us-east-1) bucket policy{ "Version": "2012-10-17", "Id": "", "Statement": [ { "Sid": "", "Effect": "Allow", "Principal": { "AWS": [ "arn:aws:iam::218546966473:role/LoaderDelta" ] }, "Action": [ "s3:DeleteObject", "s3:GetObject", "s3:ListBucket", "s3:PutObject" ], "Resource": [ "arn:aws:s3:::<YOUR_BUCKET_NAME>", "arn:aws:s3:::<YOUR_BUCKET_NAME>/*" ] } ] }Europe (eu-central-1) bucket policy{ "Version": "2012-10-17", "Id": "", "Statement": [ { "Sid": "", "Effect": "Allow", "Principal": { "AWS": [ "arn:aws:iam::218546966473:role/LoaderDelta_eu_central_1" ] }, "Action": [ "s3:DeleteObject", "s3:GetObject", "s3:ListBucket", "s3:PutObject" ], "Resource": [ "arn:aws:s3:::<YOUR_BUCKET_NAME>", "arn:aws:s3:::<YOUR_BUCKET_NAME>/*" ] } ] } -
When finished, click Save.
In the table below are the database user privileges Stitch requires to connect to and load data into Databricks Delta Lake (AWS).
| Privilege name | Reason for requirement |
| s3:DeleteObject |
Required to remove obsolete staging tables during loading. |
| s3:GetObject |
Required to read objects in an S3 bucket. Granting the |
| s3:ListBucket |
Required to determine if an S3 bucket exists, if access is allowed to the bucket is allowed, and to list the objects in the bucket. Granting the |
| s3:PutObject |
Required to add objects, such as files, to an S3 bucket. Granting the |
Step 1.2: Grant Databricks access to your Amazon S3 bucket
Next, you’ll configure your AWS account to allow access from Databricks by creating an IAM role and policy. This is required to complete loading data into Databricks Delta Lake (AWS).
Follow steps 1-4 in Databricks’ documentation to create the IAM policy and role for Databricks.
Step 2: Configure access in Databricks
Step 2.1: Add the Databricks S3 IAM role to Databricks
Follow step 5 in this Databricks guide to add IAM role you created for Databricks in Step 1.2 to your Databricks account.
After the Databricks IAM role has been added using the Databricks Admin Console, proceed to the next step.
Step 2.2: Create a Databricks cluster
- Sign into your Databricks account.
- Click the Clusters option on the left side of the page.
- Click the + Create Cluster button.
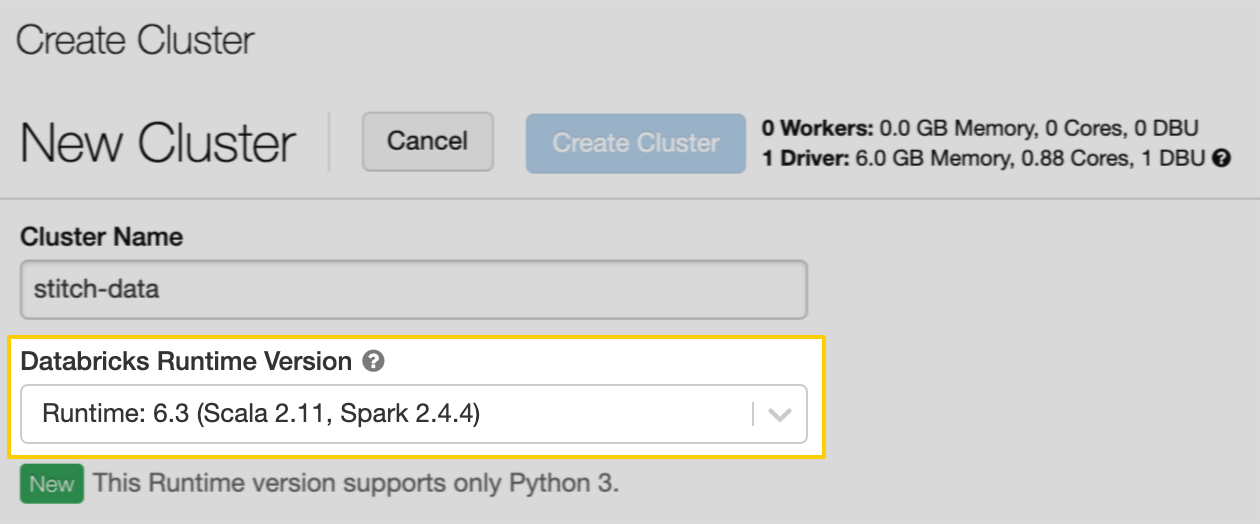
- In the Cluster Name field, enter a name for the cluster.
-
In the Databricks Runtime Version field, select a version that’s 6.3 or higher. This is required for Databricks Delta Lake (AWS) to work with Stitch:
- In the Advanced Options section, locate the IAM Role field.
- In the dropdown menu, select the Databricks IAM role you added to your account in the previous step.
- When finished, click the Create Cluster button to create the cluster.
Step 2.3: Retrieve the Databricks cluster's JDBC URL
Next, you’ll retrieve your Databricks’ cluster JDBC URL.
- On the Clusters page in Databricks, click the cluster you created in the previous step.
- Open the Advanced Options section.
- Click the JDBC/ODBC tab.
-
Locate the JDBC URL field and copy the value:
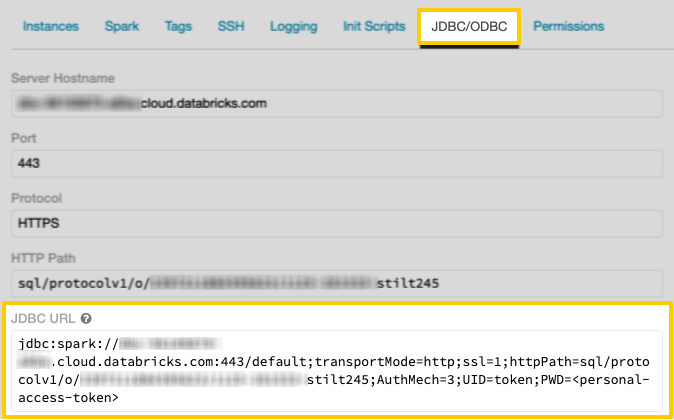
Keep this handy - you’ll need it to complete the setup in Stitch.
Step 2.4: Generate a Databricks access token
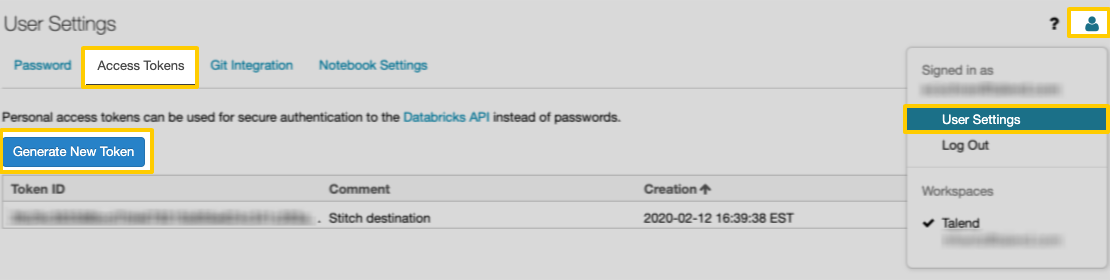
- Click the user profile icon in the upper right corner of your Databricks workspace.
- Click User Settings.
-
Click the Access Tokens tab:
- In the tab, click the Generate New Token button.
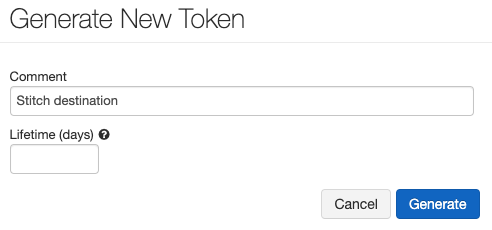
- In the window that displays, enter the following:
- Comment:
Stitch destination - Lifetime (days): Leave this field blank. If you enter a value, your token will eventually expire and break the connection to Stitch.
- Comment:
- Click Generate.
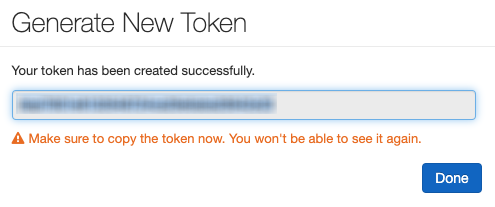
- Copy the token somewhere secure. Databricks will only display the token once.
- Click Done after you copy the token.
Step 3: Connect Stitch
- If you aren’t signed into your Stitch account, sign in now.
-
Click the Destination tab.
- Locate and click the Databricks Delta Lake (AWS) icon.
-
Fill in the fields as follows:
-
Display Name: Enter a display name for your destination, to distinguish various connections of the same type.
-
Description (optional): Enter a description for your destination.
-
Access Token: Paste the access token you generated in Step 2.4.
-
JDBC URL: Paste the JDBC URL you retrieved in Step 2.3.
-
Bucket Name: Enter the name of Amazon S3 bucket you configured in Step 1. Enter only the bucket name: No URLs,
https, or S3 parts. For example:stitch-databricks-delta-bucket
-
When finished, click Check and Save.
Stitch will perform a connection test to the Databricks Delta Lake (AWS) database; if successful, a Success! message will display at the top of the screen. Note: This test may take a few minutes to complete.
| Related | Troubleshooting |
Questions? Feedback?
Did this article help? If you have questions or feedback, feel free to submit a pull request with your suggestions, open an issue on GitHub, or reach out to us.