Stitch Admin privileges required
Setting up or modifying an existing PingFederate connection requires Admin privileges in Stitch. Refer to the Team member roles and permissions documentation for more info about privileges in Stitch.
Connect your PingFederate account to Stitch and enable Single Sign-On (SSO).
In this guide, we’ll cover:
Prerequisites
Admin privileges in Stitch. Refer to the Team member roles and permissions documentation for more info about privileges in Stitch.
Administrator privileges in PingFederate. If you don’t have these privileges, contact a PingFederate admin before continuing.
Familiarity with PingFederate and an existing PingFederate adapter instance and signing certificate. Instructions for configuring PingFederate assets are outside the scope of this tutorial; these instructions assume you’re familiar with PingFederate and have your instance set up already. If you’re not sure how to use PingFederate, contact a PingFederate admin before continuing.
Step 1: Create and configure an SP connection in PingFederate
Step 1.1: Retrieve your SSO info from Stitch
- Sign into your Stitch account.
- Click User menu (your icon) > Edit User Settings.
-
Scroll down to the Single Sign-on section and click Enable SSO.
- Select PingFederate SAML from the SSO Provider menu.
- Click Continue.
- The Configure Your PingFederate SAML SSO page will display.
Leave this page open - you’ll need it to complete the setup.
Step 1.2: Define the SP connection's general settings
- Sign into your PingFederate account as an administrator.
-
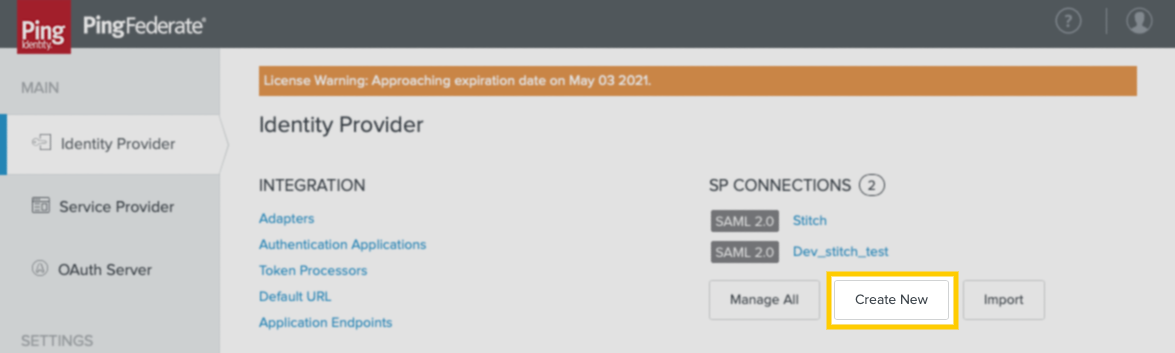
Under SP Connections, click Create New:
- In the Connection Template tab, select Do not use a template … and then click Next.
- In the Connection Type tab, check Browser SSO Profiles and then click Next.
- In the Connection Options tab, check Browser SSO and then click Next.
- In the Import Metadata tab, select None and then click Next.
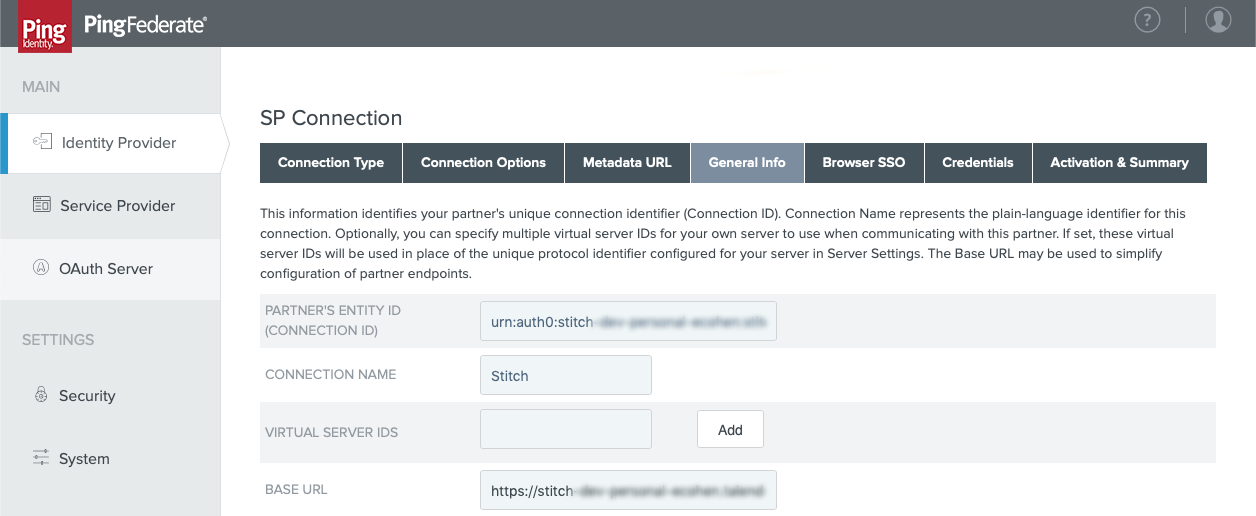
- In the General Info tab, fill in the following:
- Partner’s Entity ID (Connection ID): Paste the Entity ID value from Stitch into this field.
- Connection Name: Enter a name for the connection. For example:
Stitch - Base URL: Paste the Base URL value from Stitch into this field.
The page should look similar to the following:
- When finished, click Next.
Step 1.3: Define the SP connection's browser SSO configuration
Step 1.3.1: Define the SP connection's attribute contract
Next, you’ll define the user attributes for the app:
| # | SAML attribute name | Attribute name format |
| 1 | given_name | urn:oasis:names:tc:SAML:2.0:attrname-format:basic |
| 2 | family_name | urn:oasis:names:tc:SAML:2.0:attrname-format:basic |
| 3 | urn:oasis:names:tc:SAML:2.0:attrname-format:basic |
- On the Browser SSO page, click the Configure Browser SSO button.
- On the SAML Profiles page:
- Check IDP-Initiated SSO and SP-Initiated SSO.
- Click Next.
- In the Assertion Lifetime tab, click Next.
- In the Assertion Creation tab:
- Click Configure Assertion Creation.
- In the Identity Mapping tab, select Standard and then click Next.
- In the Attribute Contract tab:
- In the SAML_SUBJECT > Subject Name Format field, select
urn:oasis:names:tc:SAML:1.1:nameid-format:emailAddress. - In Extend the Contract section:
- In the blank field, enter the SAML attribute name of an attribute in the table above. For example:
email - In the Attribute Name Format field, select
urn:oasis:names:tc:SAML:2.0:attrname-format:basic. -
Repeat these steps until all attributes in the table have been added. The page should look similar to the following:
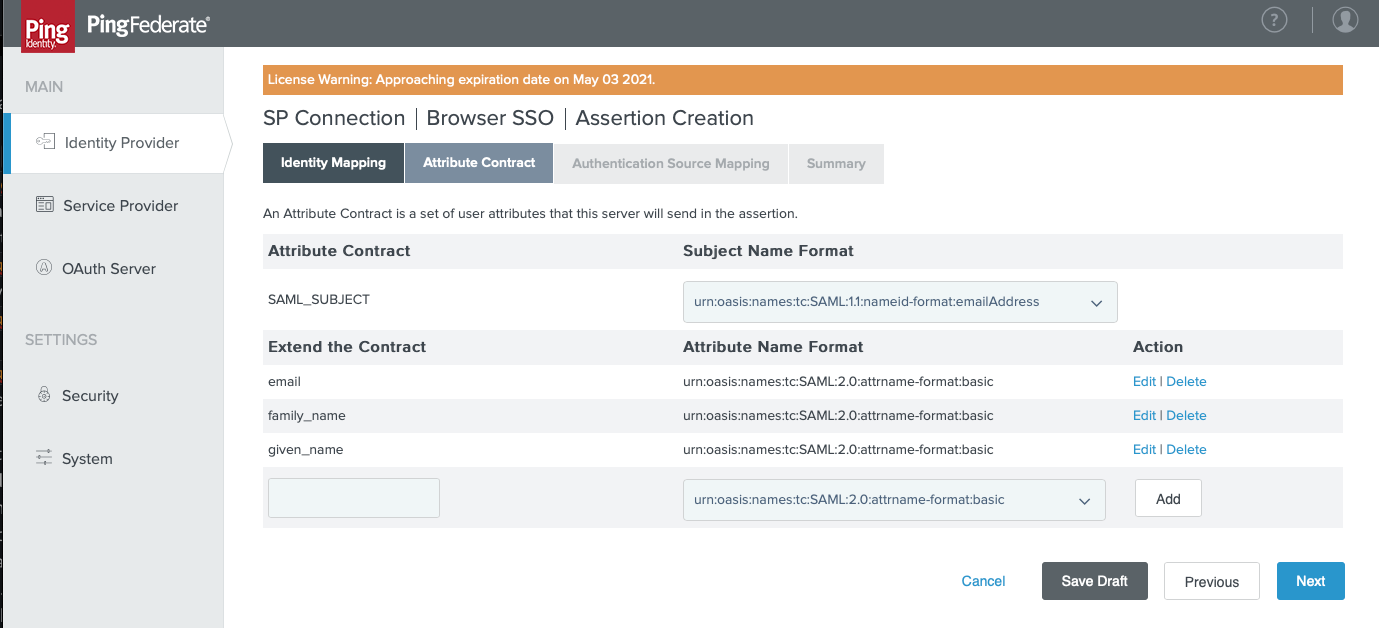
- In the blank field, enter the SAML attribute name of an attribute in the table above. For example:
- When finished, click Next.
- In the SAML_SUBJECT > Subject Name Format field, select
Step 1.3.2: Define the SP connection's authentication source map
- In the Authentication Source Mapping tab, click Map New Adapter Instance.
- In the Adapter Instance tab, select the instance you want to use and click Next.
- In the Mapping Method tab, select Use only the adapter contract values in the SAML assertion and click Next.
- In the Attribute Contract Fulfillment tab, populate each of the Attribute Contract values according to your Adapter Instance.
- When finished, click Next.
Step 1.3.3: Complete the SP connection's assertion creation
- In the Issuance Criteria tab, click Next.
- In the Summary tab, click Done.
- You’ll be redirected back to the Authentication Source Mapping tab. Click Next.
- On the Summary tab, click Done.
- You’ll be redirected back to the Assertion Creation tab. Click Next.
Step 1.3.4: Define the SP connection's protocol settings
- In the Protocol Settings tab, click Configure Protocol Settings.
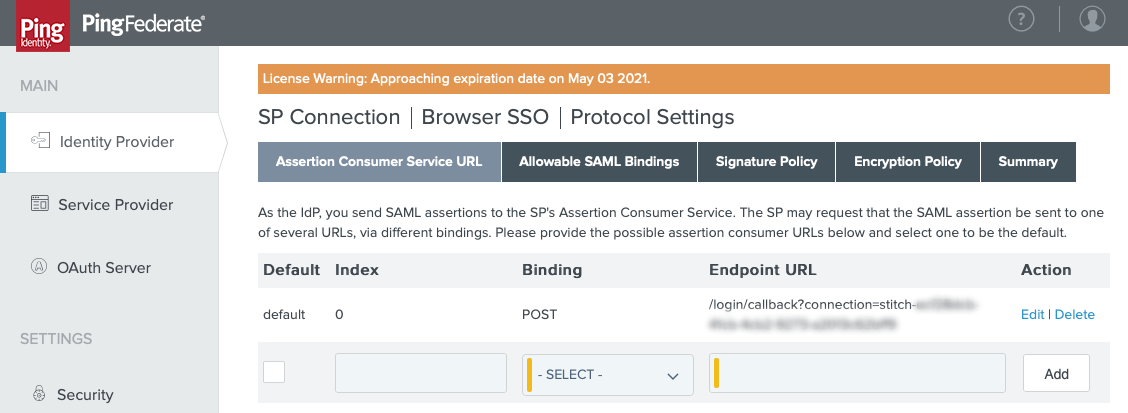
- In the Assertion Consumer Service URL tab, fill in the following:
- Check the Default box.
- Binding: Select POST.
- Endpoint URL: Paste the Endpoint URL value from Stitch.
-
Click Add. The page should look similar to the following:
- Click Next.
- In the Allowable SAML Bindings tab:
- Check POST and REDIRECT.
- Click Next.
- Accept the defaults for the Signature Policy and Encryption Policy tabs by clicking Next.
- In the Summary tab, review the configuration and click Done when finished.
- You’ll be redirected back to the Protocol Settings tab. Click Next.
- In the Summary tab, click Done to complete the app’s browser SSO configuration.
Step 1.4: Configure the SP connection's credentials
- After clicking Done, you’ll be redirected back to the Browser SSO tab. Click Next.
- In the Credentials tab, click Configure Credentials.
- In the Digital Signature Settings tab, select a Signing Certificate.
- Check these boxes:
- Include the certificate in the signature [KEYINFO] element
- Include the raw key in the signature [KEYVALUE] element
The page should look similar to the following:
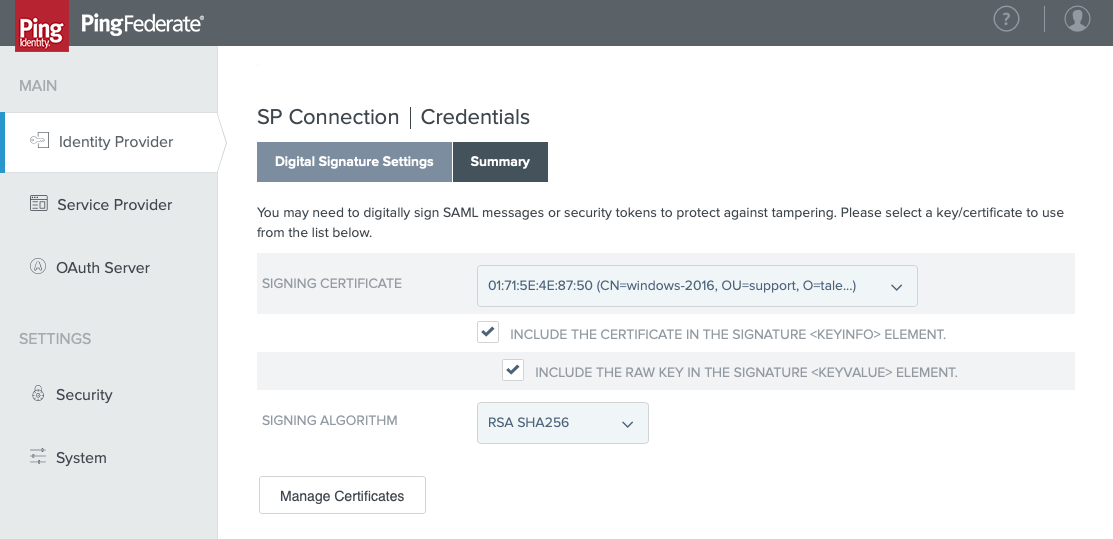
- When finished, click Next.
- On the Summary tab, click Done.
Step 1.5: Grant users access
The last step to configuring the connection is to grant access to users in your PingFederate instance. This ensures that they’ll be able to access Stitch via SSO.
Using the process your organization follows, grant Stitch PingFederate access to your colleagues.
Step 2: Download the SP connection's SAML metadata file
- In the left sidenav, click Settings > System.
- On the System page, click SAML Metadata > Metadata Export.
- In the Metadata Role tab, select I am the Identity Provider (IDP) and click Next.
- In the Metadata Mode tab, select Use a connection for metadata generation and click Next.
- In the Connection Metadata tab, select the SP connection you created in Step 1 and click Next.
- In the Metadata Signing tab:
- Select your Signing Certificate.
- Check these boxes:
- Include the certificate in the signature [KEYINFO] element
- Include the raw key in the signature [KEYVALUE] element
- Click Next.
- In the Export & Summary tab, click Export. Save the file somewhere convenient - you’ll need it to complete the setup in Stitch.
Step 3: Connect to Stitch
Navigate back to the page where your Stitch account is open.
- In Stitch, scroll down to the Connect to Stitch section of the PingFederate setup page.
- Click Upload SAML Metadata.
- Locate and select the SAML metadata file you downloaded in Step 2.
Step 4: Activate SSO
When finished, click the Activate SSO button.
Next steps
After you’ve enabled SSO for your Stitch account, remember to grant Stitch access to users in your PingFederate instance, if you haven’t already.
| Related | Troubleshooting |
Questions? Feedback?
Did this article help? If you have questions or feedback, feel free to submit a pull request with your suggestions, open an issue on GitHub, or reach out to us.